EMERGENT TECHNOLOGY WORK GROUP - ED TECH REVIEWS
Improving speech intelligibility for hybrid courses
by Sage Freeman
Media Specialist
Chemeketa Community College
July 1st, 2019
Technology Evaluated: MXL AC-360-Z Microphone with Zoom Rooms
Exploration Intent
At Chemeketa we have challenges capturing adequate quality audio from the physical classroom environment so that students online can participate effectively in class discussions and activities. Recent advancements in audio conferencing technologies now offer potential opportunities for cost effective solutions that could address these issues.
This project seeks to explore new innovative solutions in audio conferencing technology that could provide cost effective, portable, and easy to use solution for instructors teaching live synchronous hybrid courses.
We wanted to test the MXL AC-360-Z microphone to see how well it could perform in various size classrooms. We also wanted to explore Zoom Rooms to evaluate how the audio is individually processed and optimized as well as support for linking multiple mics together to accommodate larger room sizes.
Our hope is to offer instructors easy-to-use solutions that can transform any classroom into a collaborative workspace with high quality web and video conferencing capabilities.
Technology Evaluated
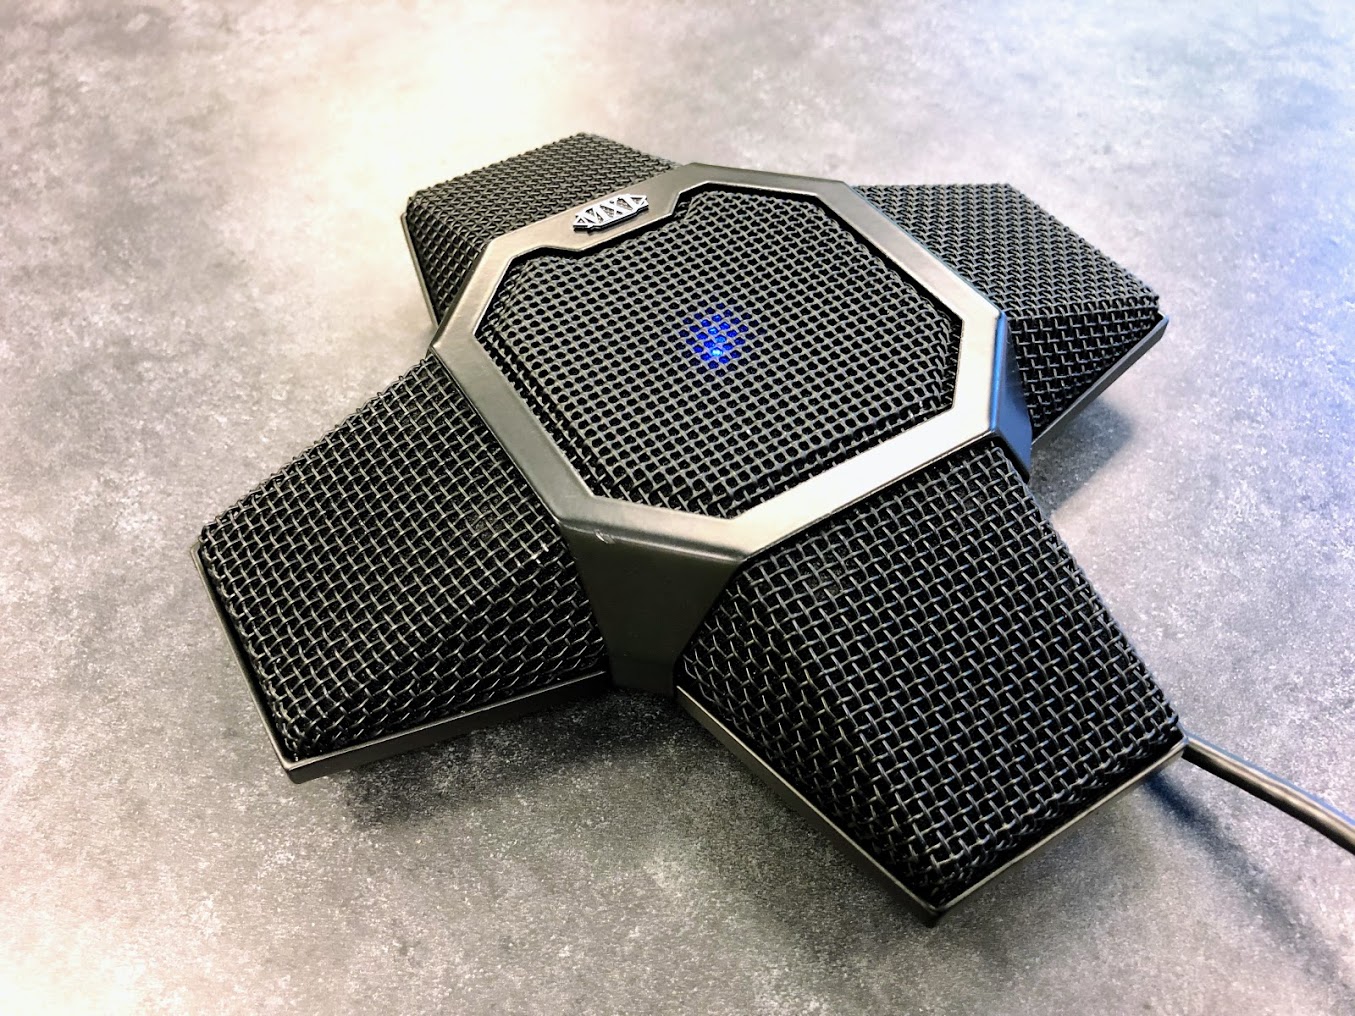
AC-360-Z Microphone by MXL
This microphone was designed specifically for use with Zoom Rooms which can accept input from all four mics at once for audio processing.
Zoom Rooms
This is a software-based room system that provides an integrated experience for audio conferencing, wireless screen sharing and video conferencing.
Setup & Implementation
Installing Zoom Rooms App & Paring with Host Computer
To start we used a dedicated classroom in our department for initial setup and testing. Installing the required software for Zoom Rooms only took a few minutes. We downloaded the Zoom Rooms application onto our classroom computer (Intel NUC – Windows 10 PC). We were required to have administrative rights on the computer to perform the installation.
Next we downloaded the Zoom Rooms Controller app to our iPad. Zoom Rooms requires the use of a touch screen device to manage the meeting controls for the host computer running the Zoom Room. This device must be paired and connected to the host computer in the room.
During this part of our setup we discovered that our college IT did not allow wireless devices to connect to computers on our campus network. Instead we had to purchase an additional accessory to get things working. We used an iPad ethernet adapter from Red Park to connect our controller to the host computer. This workaround solution was included in the Zoom getting started help. There was also a model available that would charge the iPad over ethernet when locked down or left in the classroom all the time.
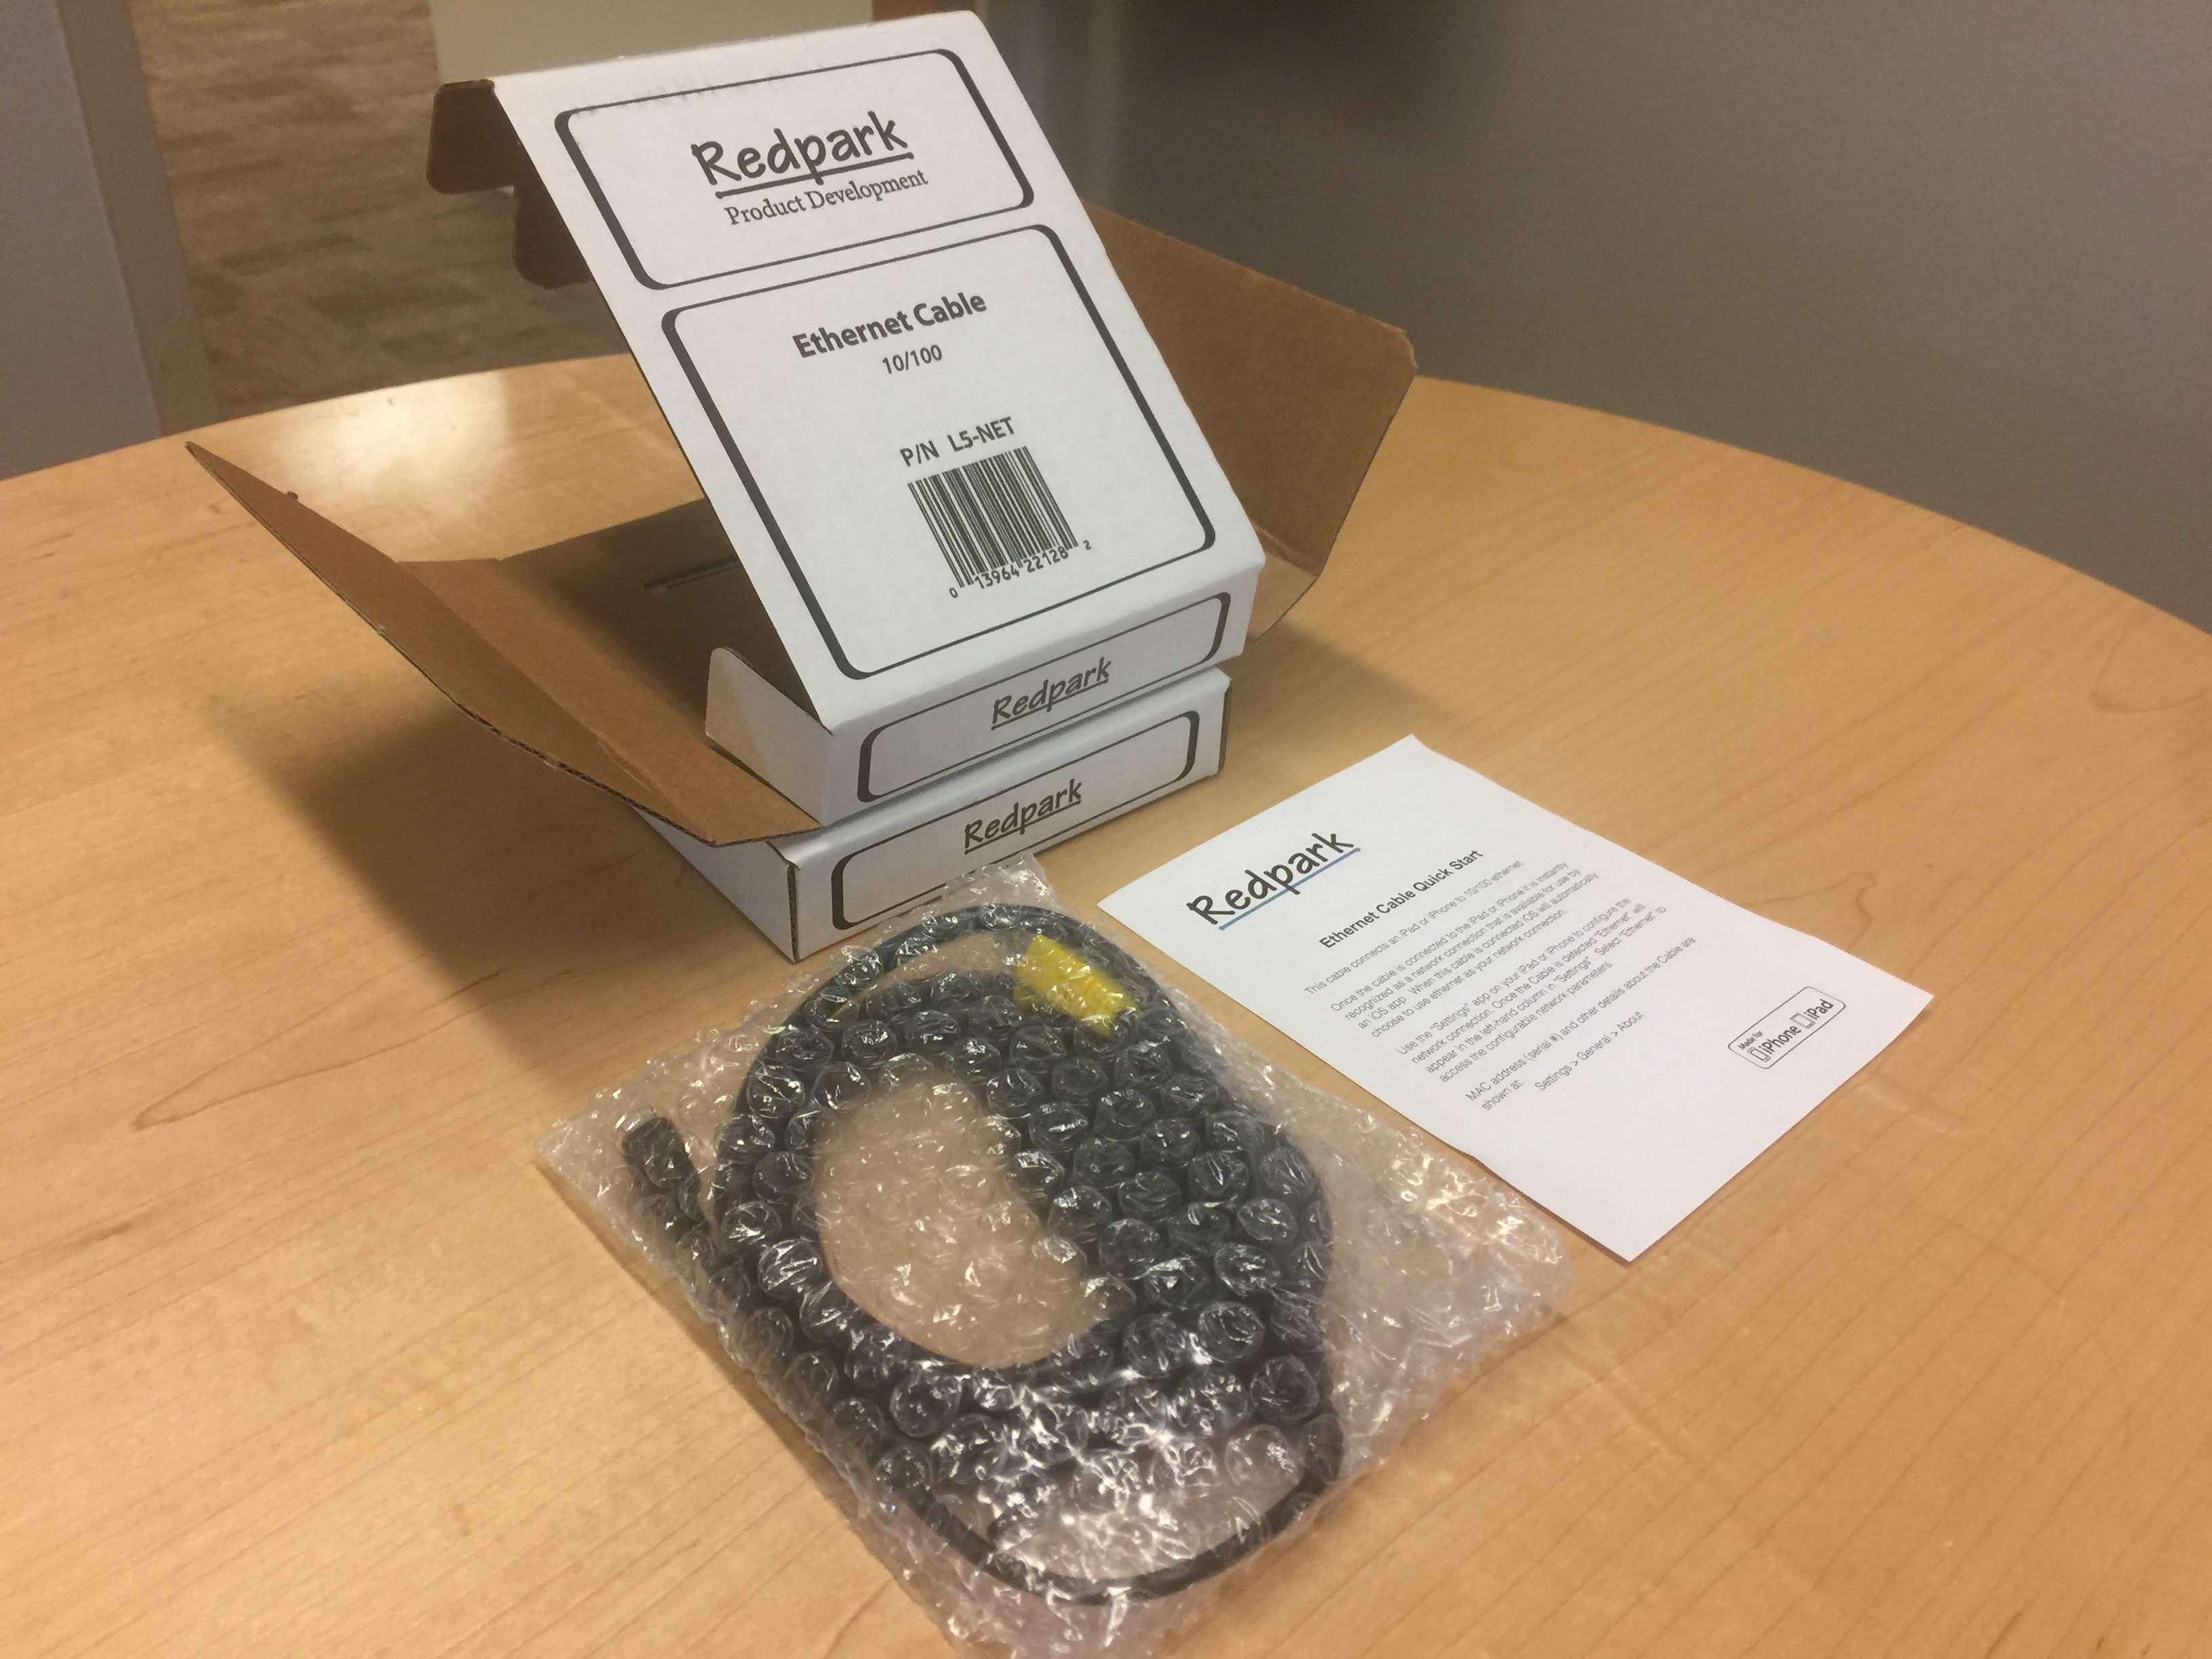
Image above showing the iPad ethernet adapter from Red Park.
Connecting the AC-360-Z Microphone
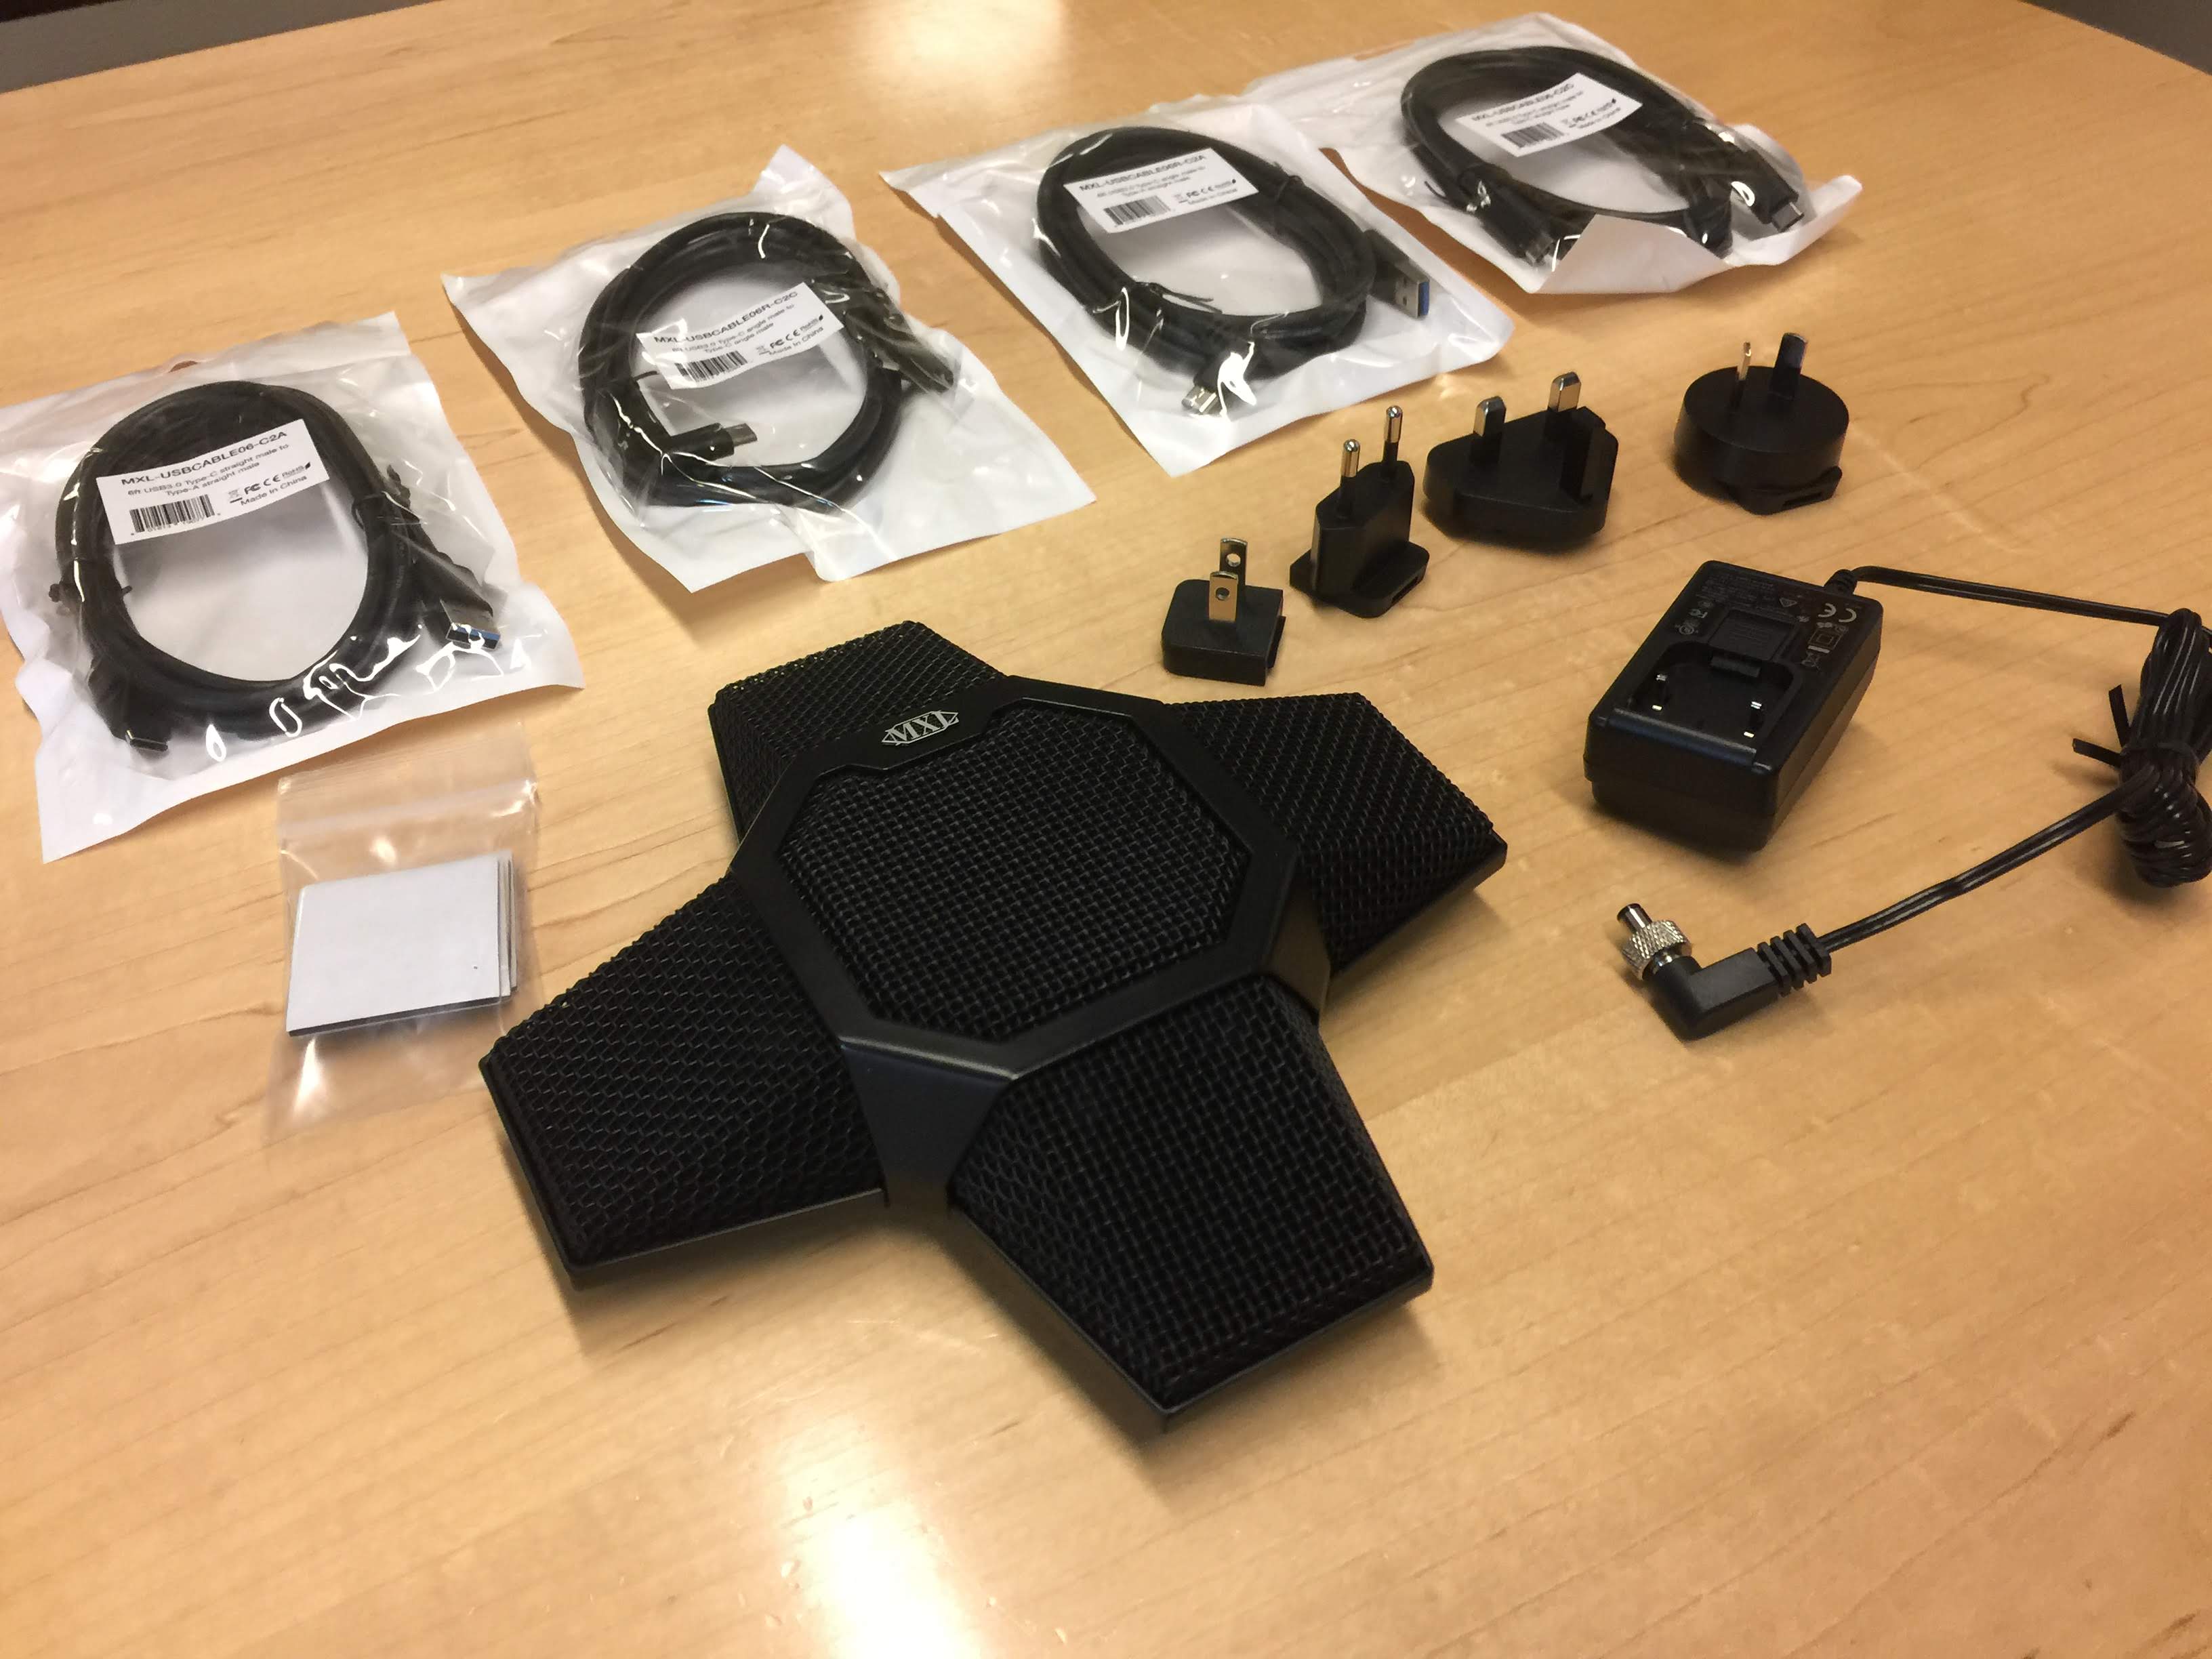
The microphone was nicely packaged and included an AC power adapter and several USB-C cables. The mic included rubber feet for firm placement on a table surface. There were no instructions included on how to install or configure the mic. The USB-C cables provided with the mic were not long enough so we had to also purchase 15 ft extension cables for this project.
Connecting the mic to the computer for the first time was simple. Zoom Rooms was able to detect both AC-360-Z mics once we connected them all together. Once connected we had to manually adjust the microphone sensitivity input levels for each of the four microphones from the Sound Properties Control Panel on the computer.
After performing a few test recordings in Zoom Rooms we then had everything setup and configured to begin using the mic in the room.
Microphone Testing
During this project we performed a variety of tests with the MXL AC-360-Z microphone:
- Captured audio in various size classrooms
- Used the mic to conduct a hybrid class
- Recorded sample audio to analyze for quality of sound
Classroom Seating Sizes
Meeting Room (1-15 seating)
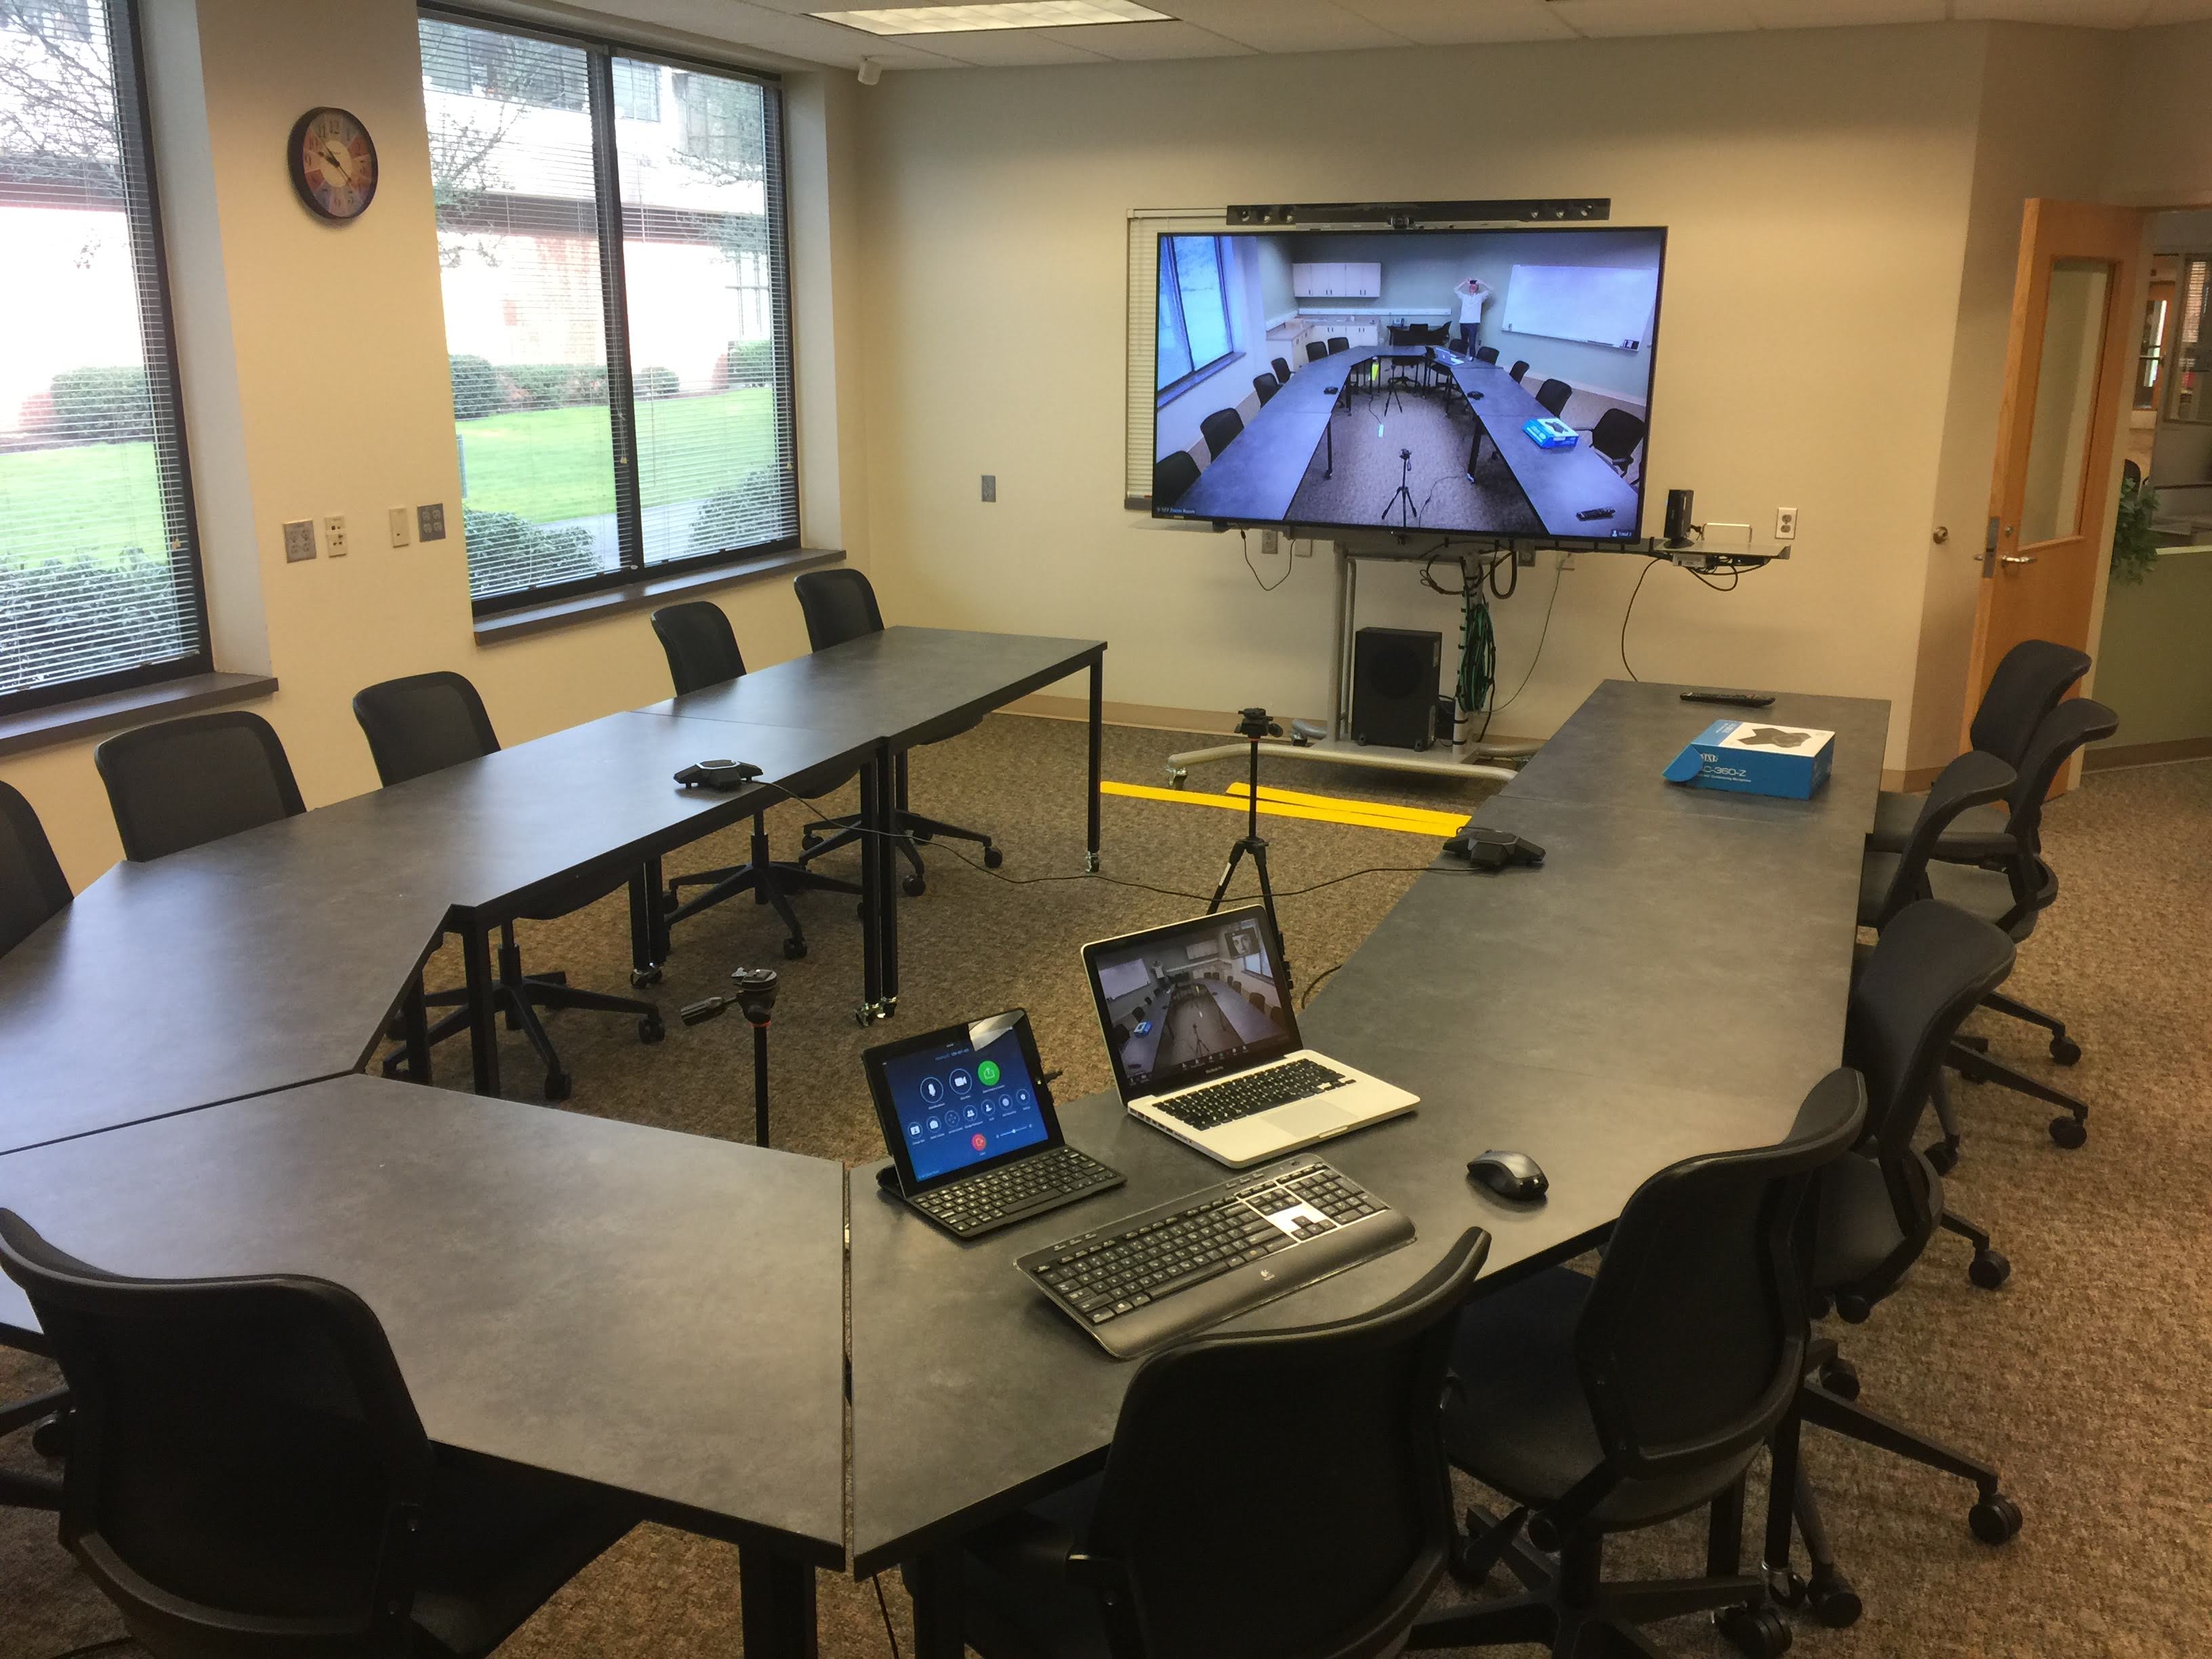
First we tested in a classroom that was approx. 30ft x 30ft and would be considered a small to medium size classroom. The room is carpeted with tables arranged in a conference layout. We placed (2) MXL mics down the center aisle between tables approx. 5 ft away from people sitting.
Hybrid Classroom (15-30 seating)
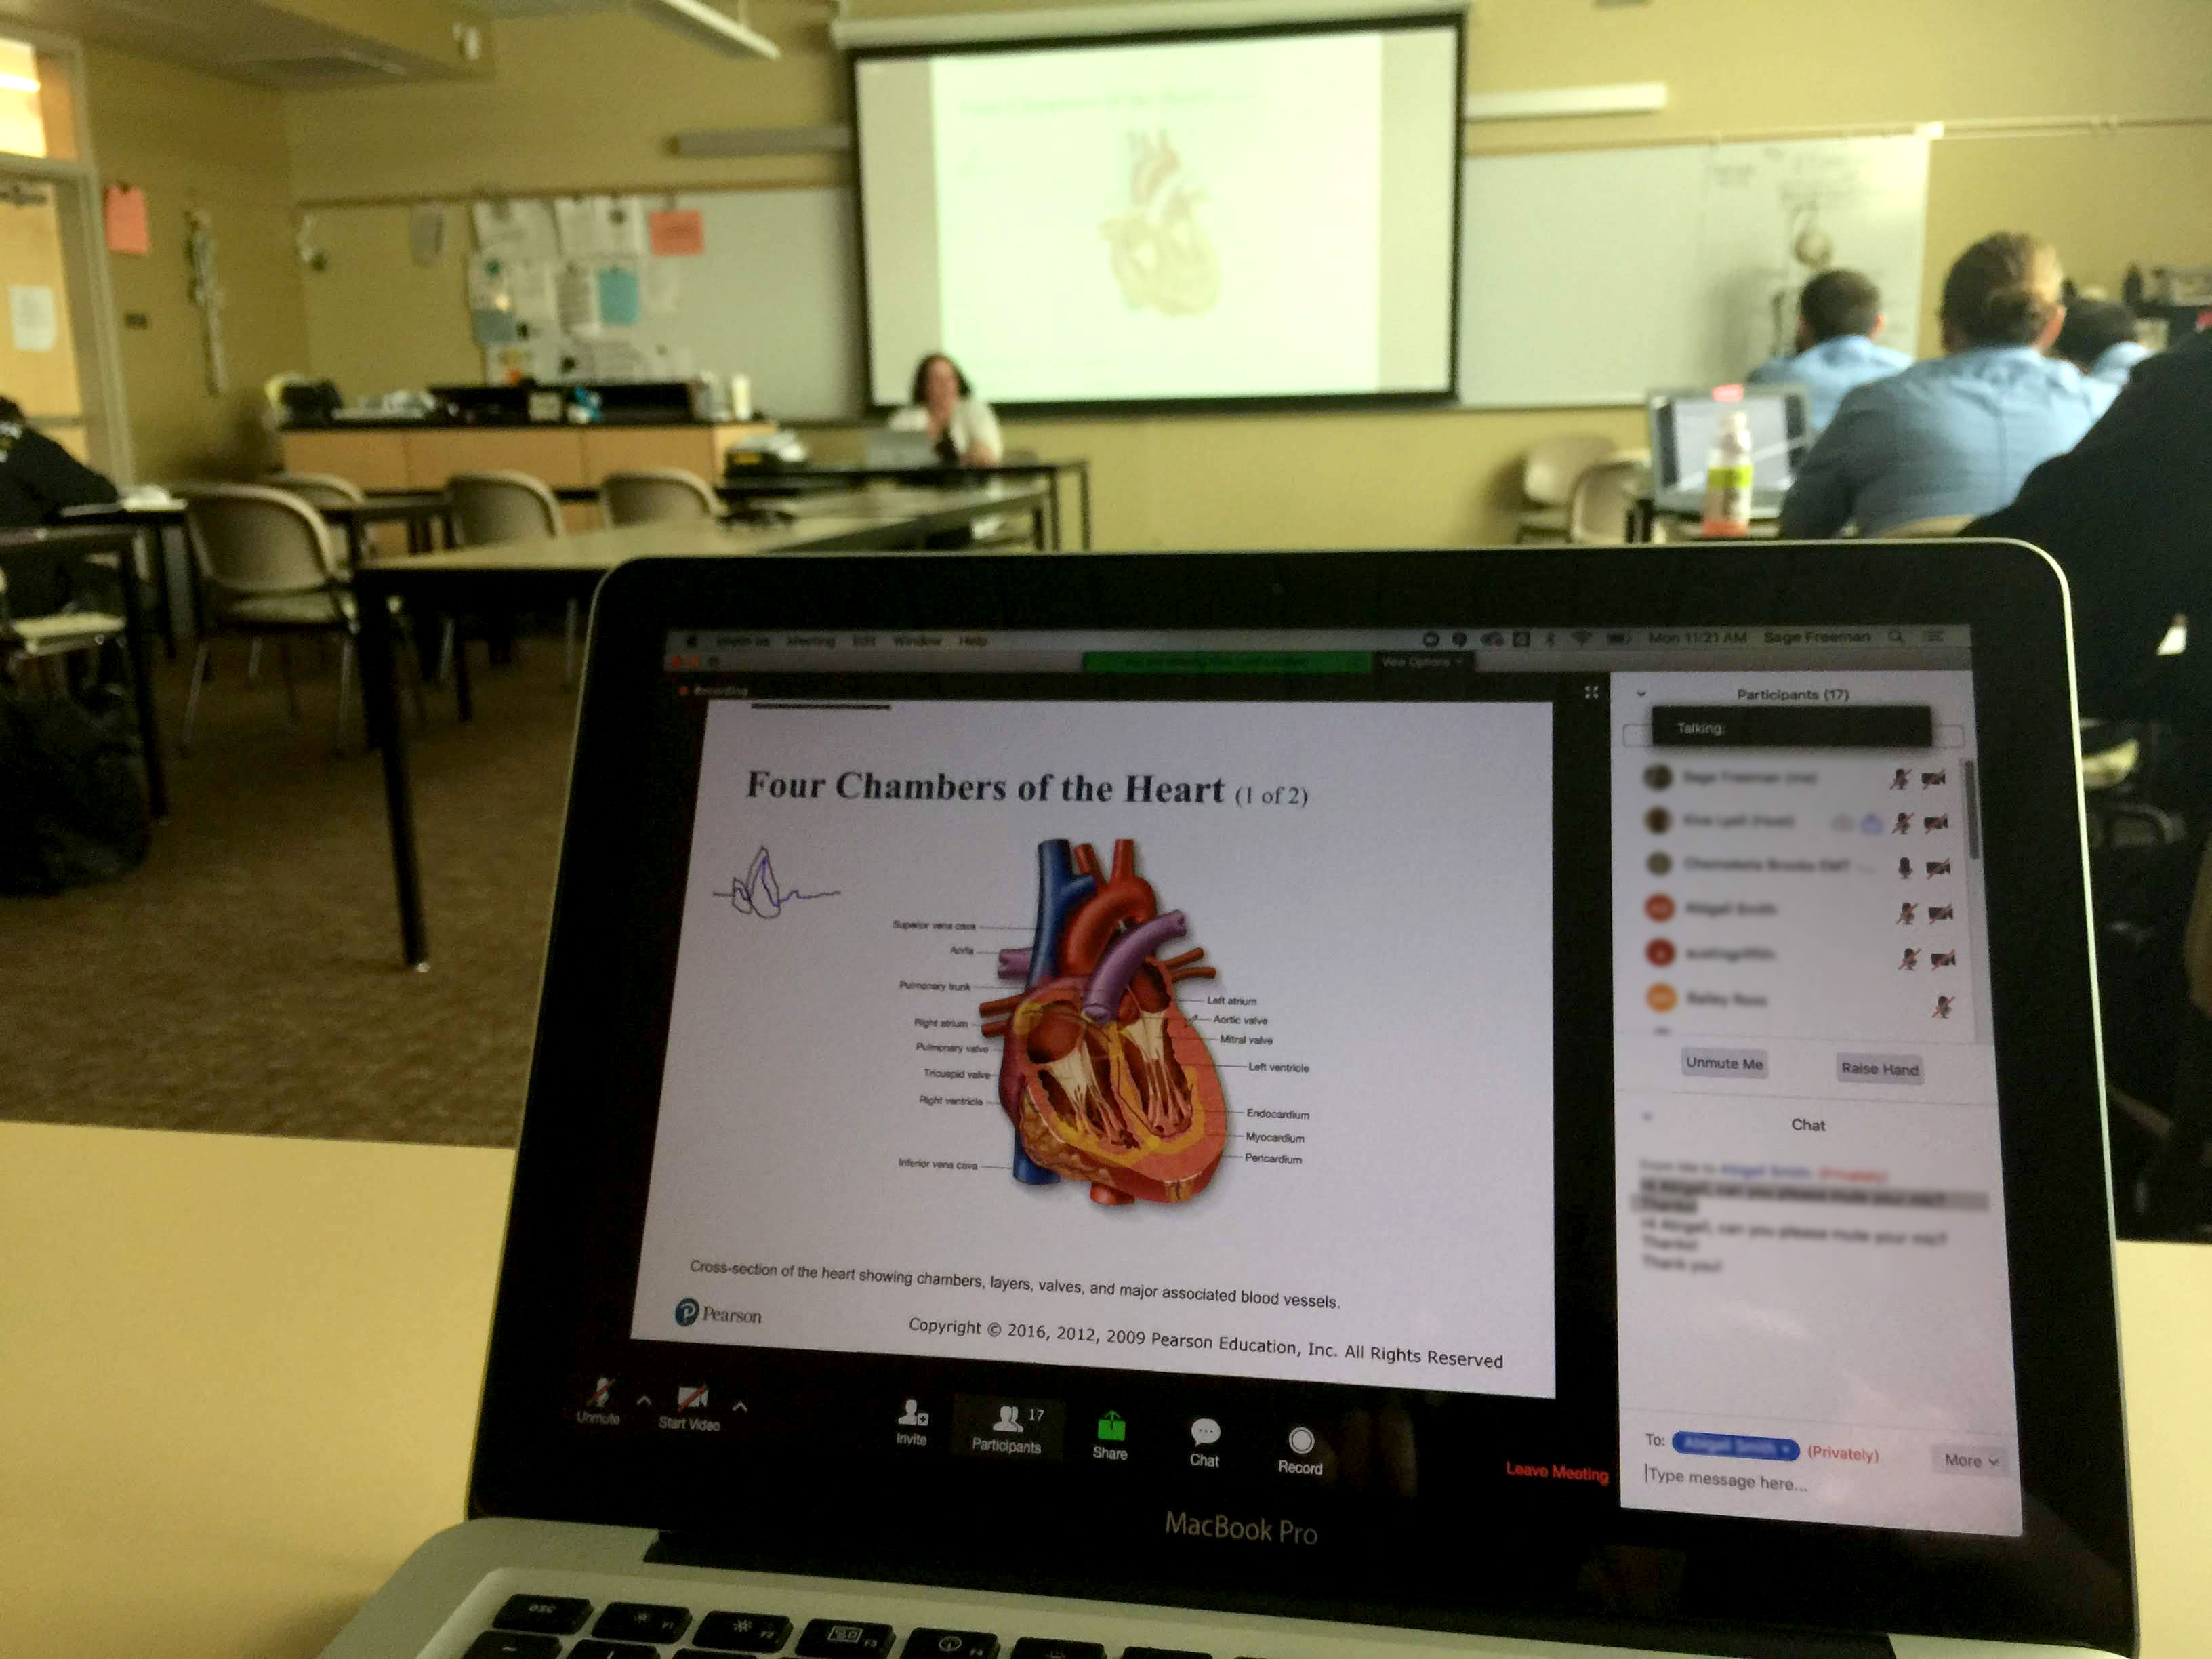
During spring term we worked with an Emergency Medical Technology (EMT) instructor to test Zoom Rooms and the MXL microphone and one of her hybrid classes. This room was approx. 100 ft x 50 ft and would be considered a large classroom. This class had approx. 35 students enrolled with 50% of the students attending via Zoom.
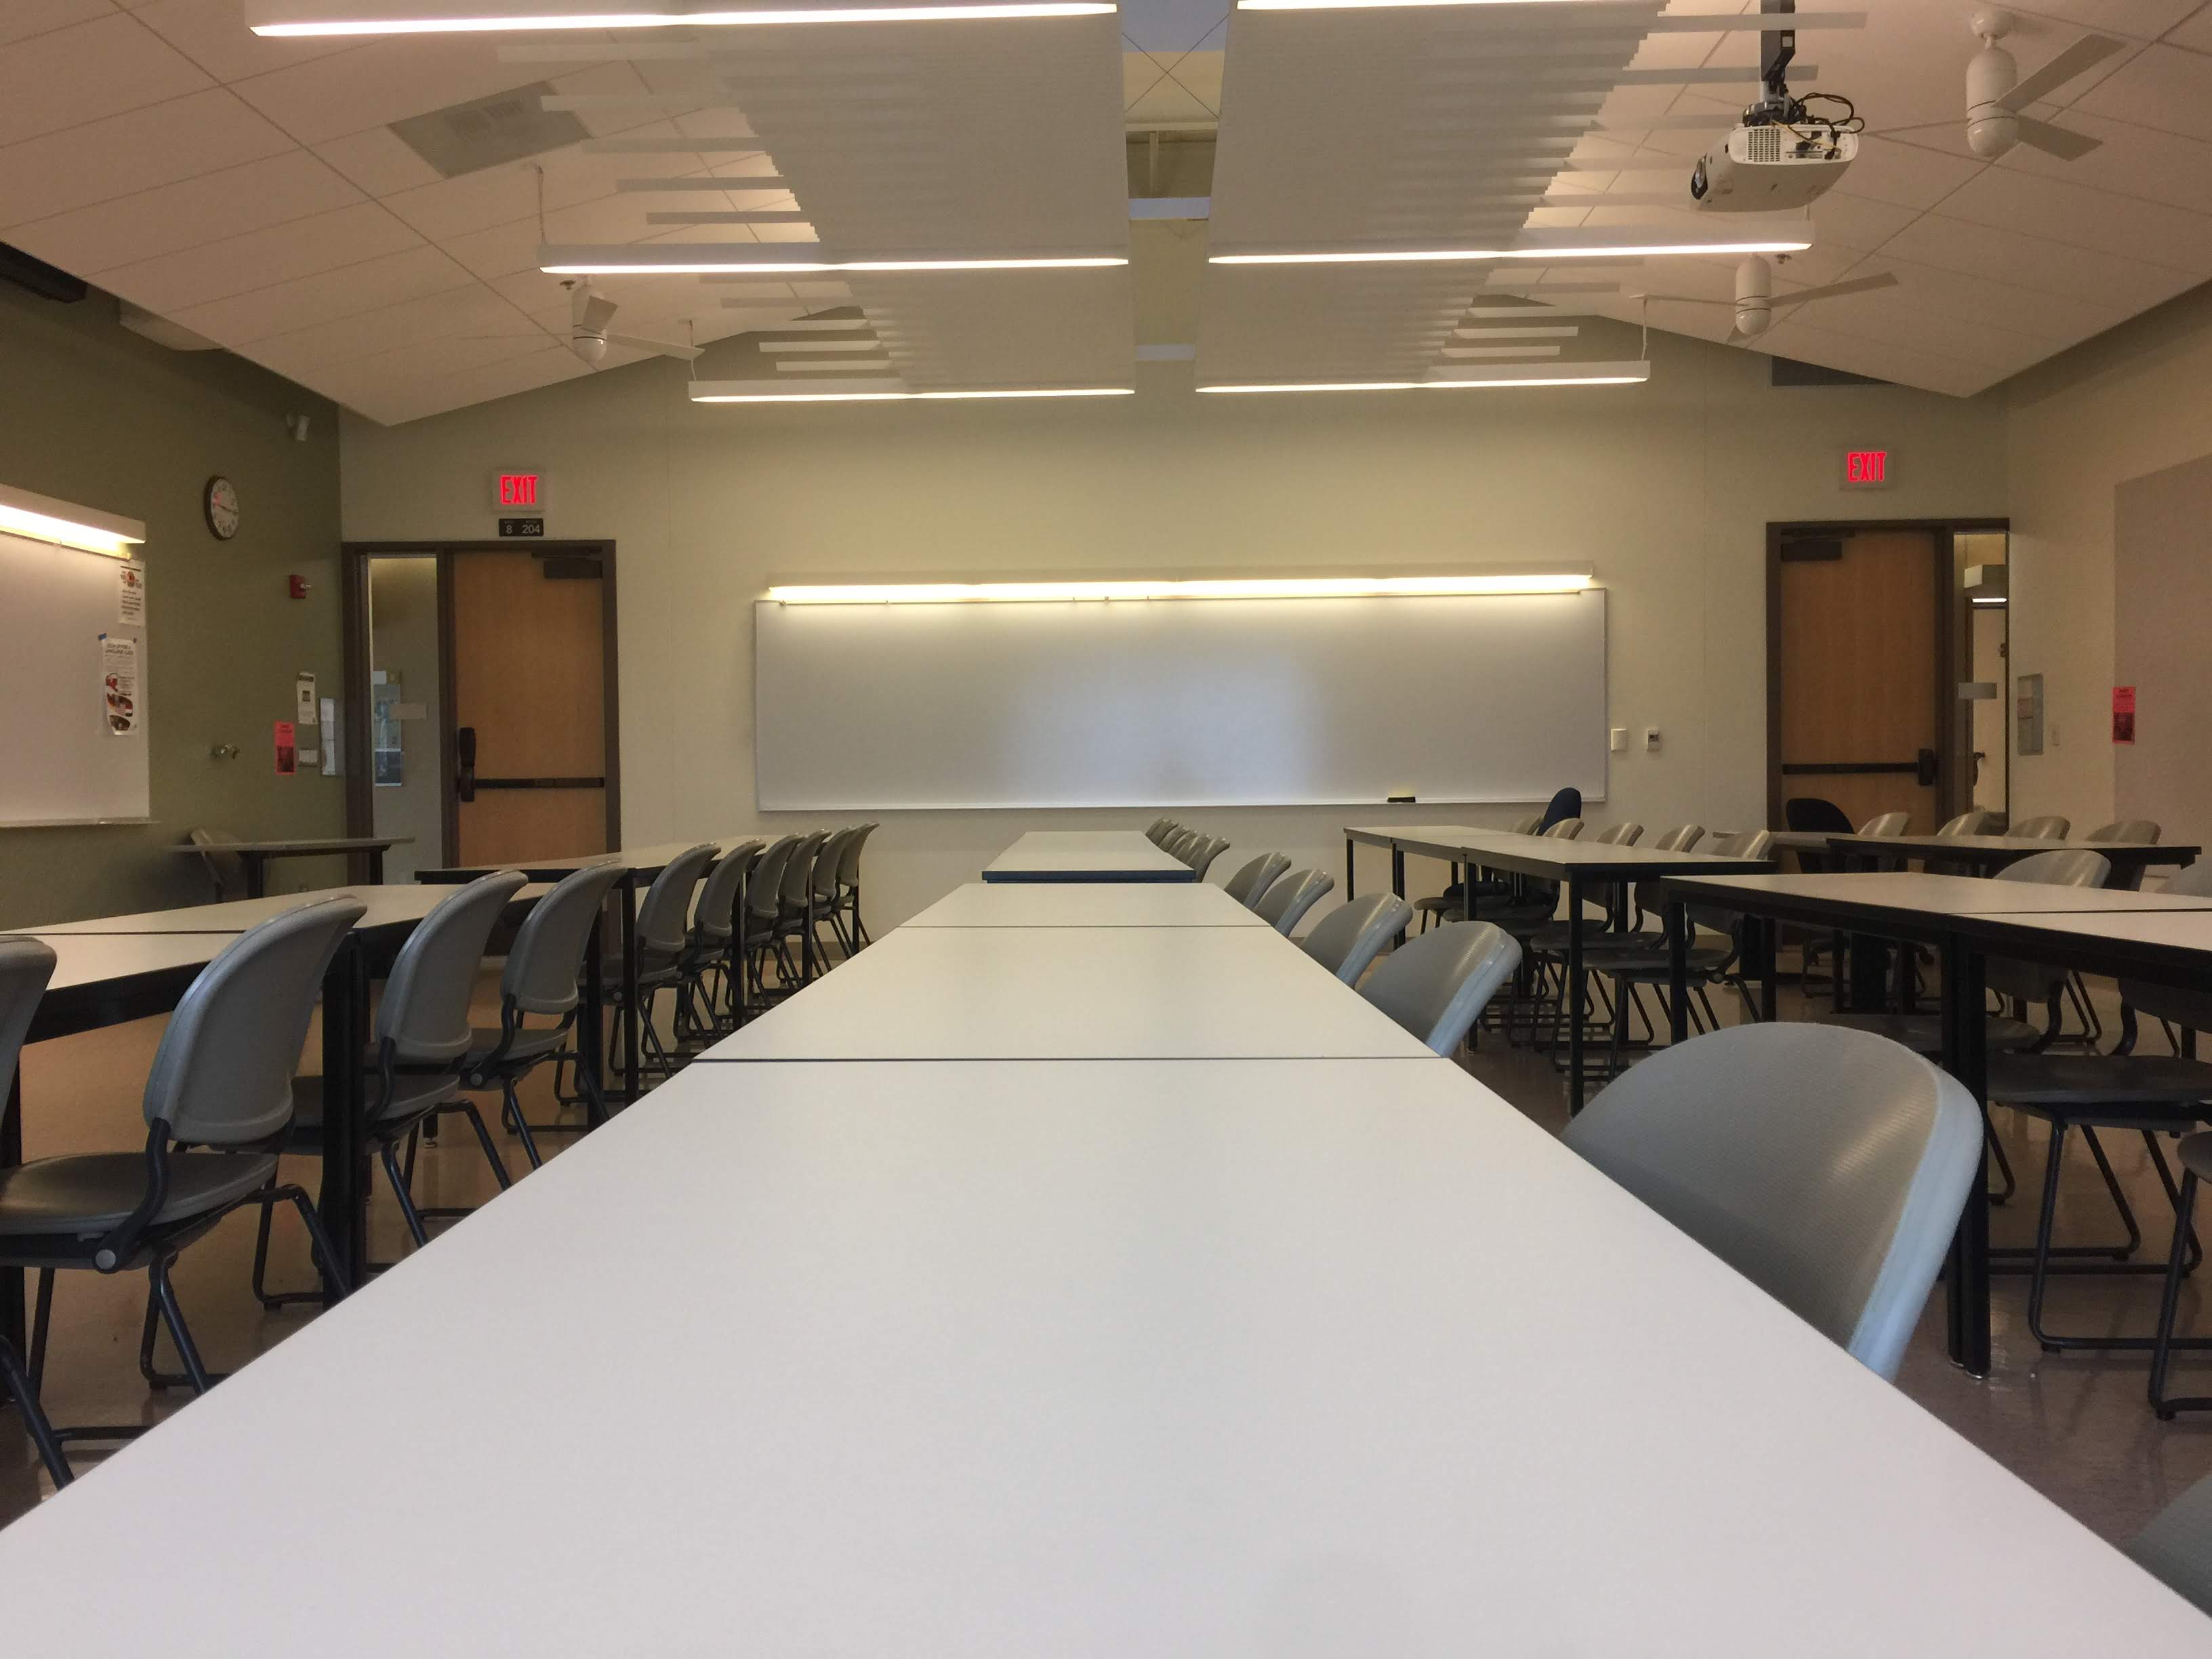
Large Classroom (30+ seating)
We conducted testing in a very large classroom approx. 100ft x 50ft. This room had tile floors and lots of windows and hard surfaces.
Classroom Size Microphone Performance
After recording a variety of tests in each of these rooms I analyzed the audio using Adobe Audition.
The MXL mic performed best in smaller rooms when placed in close proximity to the speaker’s voices. The microphone proximity had more impact on my test results than the overall size of the room. The MXL mic did not perform well when placed further than 6 ft away from people speaking. Audio loudness or perceived volume was not adequate.
When reviewing the audio from the Hybrid Classroom the instructor’s voice was clear and with moderate volume/loudness. However, student’s voices were faint and difficult to hear. The instructor was sitting at approximately the same distance as students from the MXL mics in the room (+/- 6ft).
In the Large Classroom the recording tests showed very similar results. This room has a hard surface floor with a large spread out seating arrangement. We connected two MXL AC-360-Z microphones together to cover this larger area. Once again the MXL mic needed to be within 6 ft or less from people speaking to capture adequate volume.
Comparing the MXL Microphone
We recorded audio samples using four different microphones to see how well the MXL Ac-360-Z was able to perform when compared to other microphones we had available to us. Below are the four microphones we tested.
AC-360-Z Microphone
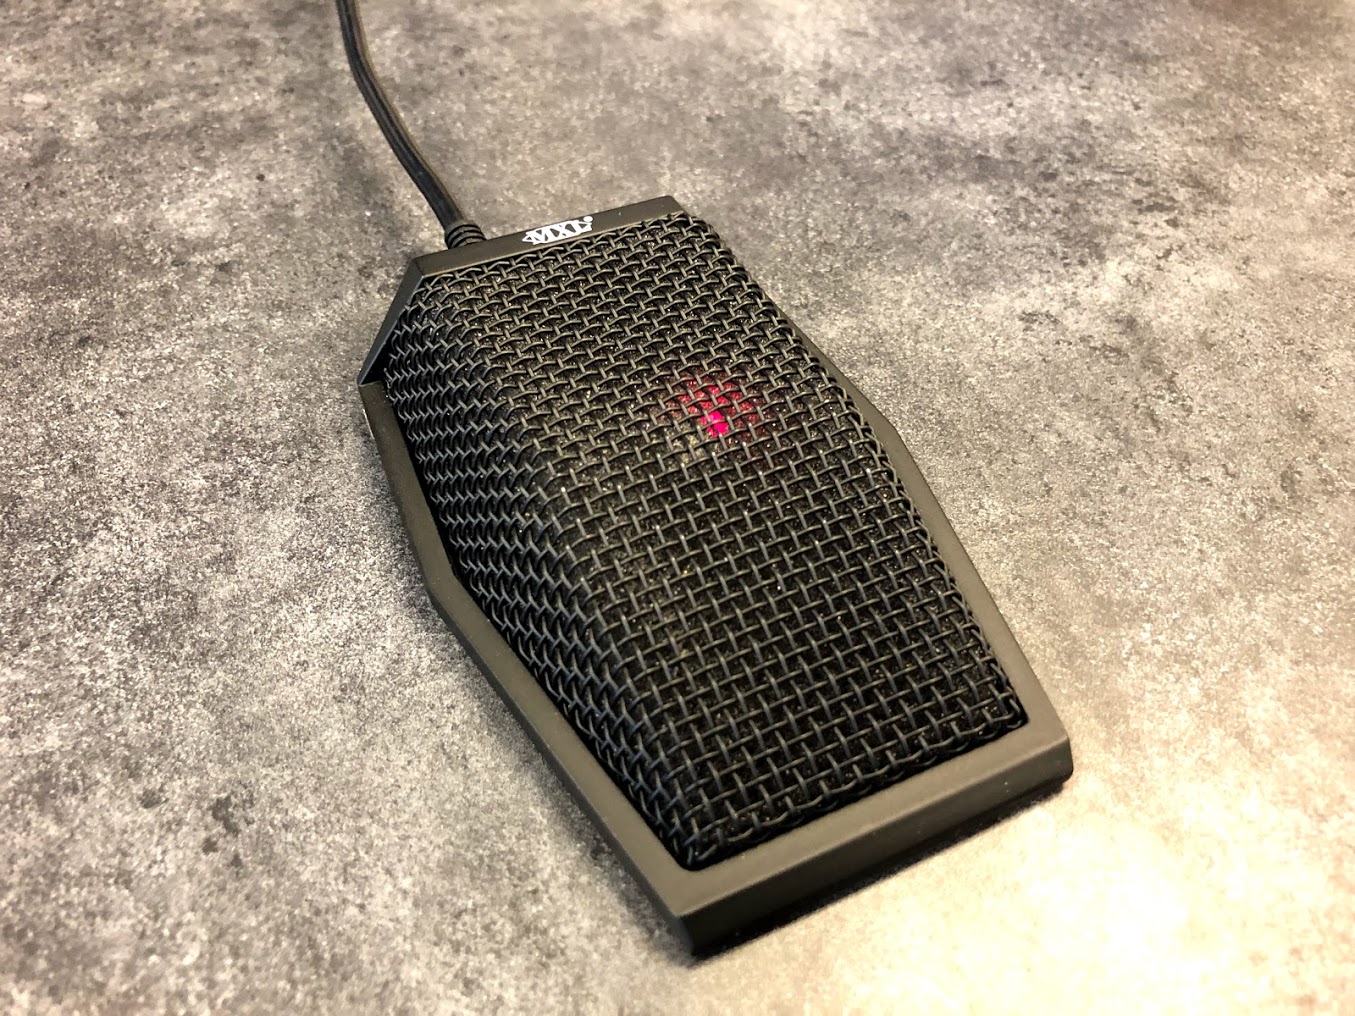
AC-404-USB Microphone
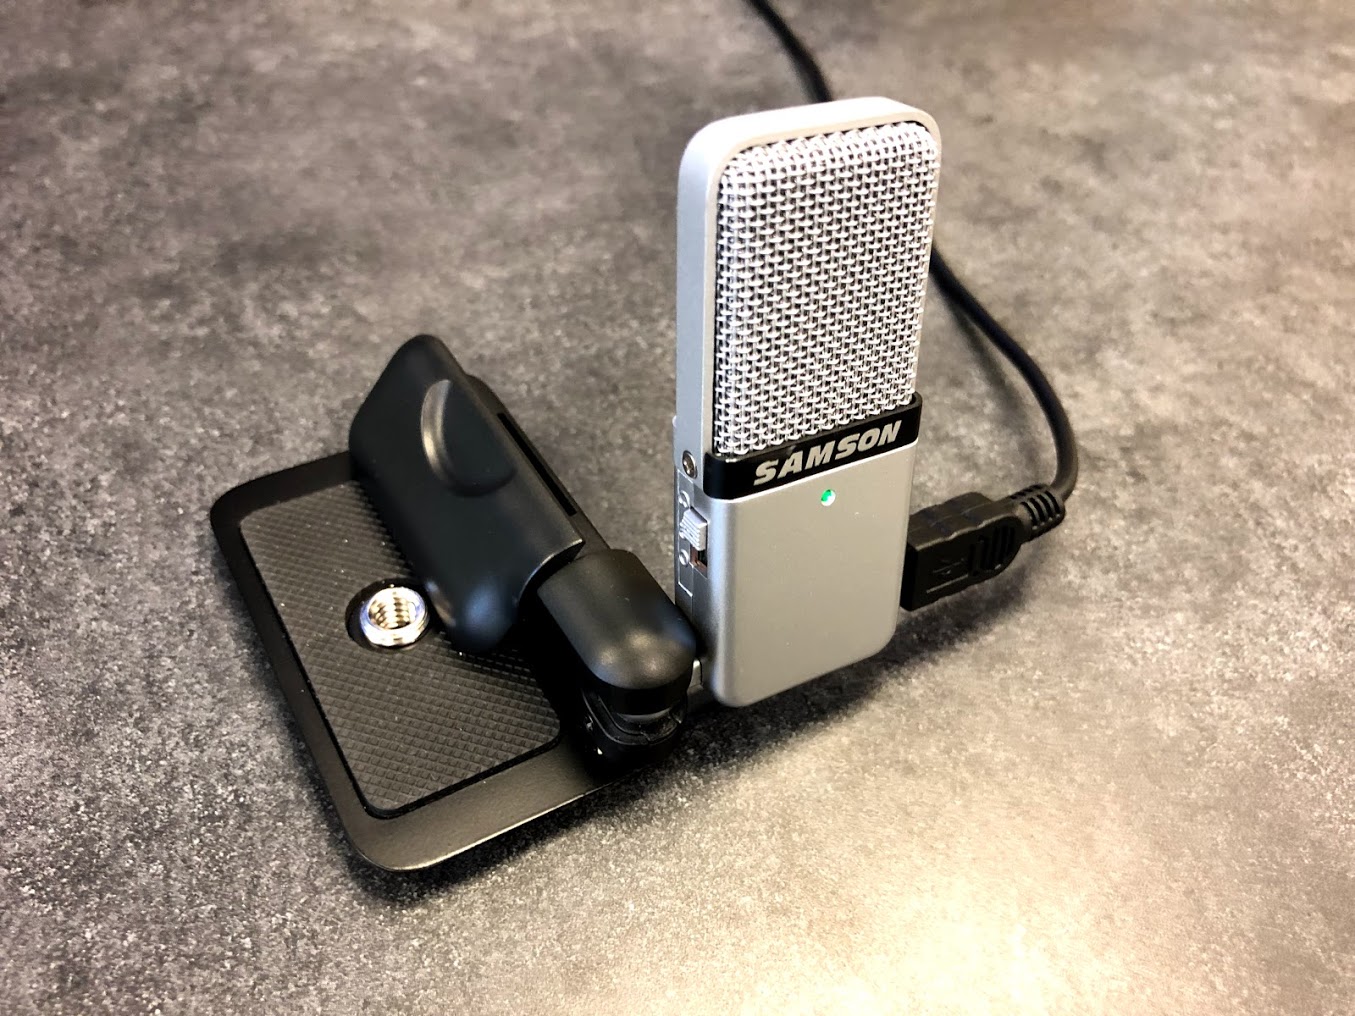
Samson Go Mic
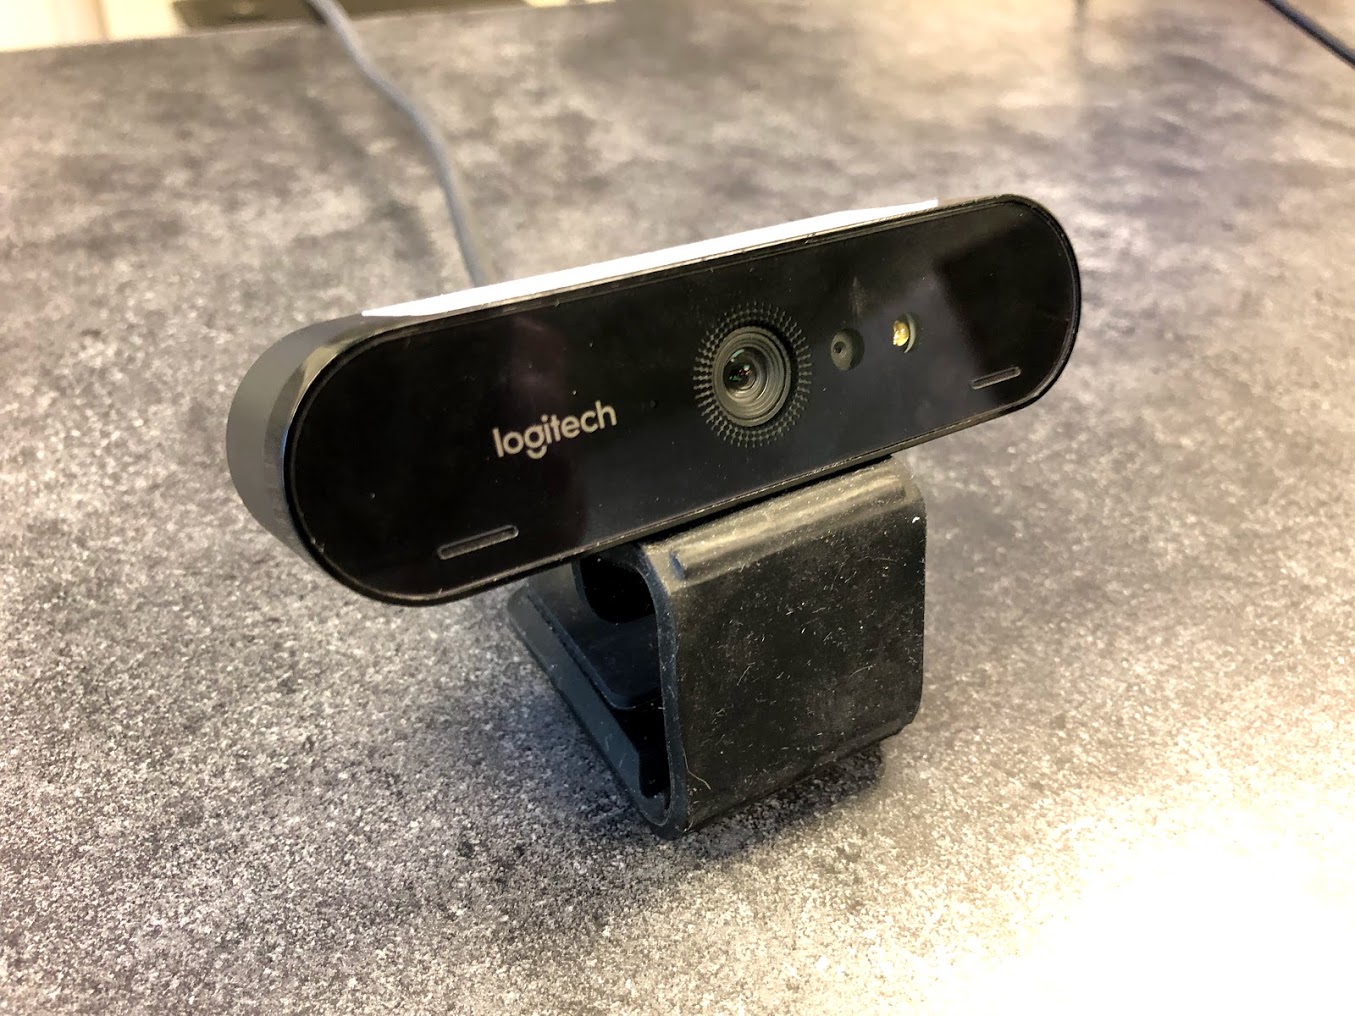
Logitech Brio Webcam
Sensitivity & Input Levels
When documenting and comparing the input levels I found the results showed fairly significant differences. First I noted the default input levels when connecting each mic. Next I adjusted the input levels on my computer while monitoring the meter for peak levels using the same relative volume in my voice.
The table below shows the calibrated input level for each microphone tested.
|
Microphone Sensitivity Levels |
||||
| Mic | AC-360-Z | AC-404-Z | Samson Go | Logitech Brio |
| Level | 100% | 30% | 74% | 39% |
The AC-404-Z and Logitech Brio both showed higher sensitivity causing me to reduce the input levels on the computer. In my opinion these two mics were both designed to be more versatile and thus able to capture audio from further distances.
The AC-360-Z and Samson Go mic had much lower sensitivity. I believe these mics were designed to always be placed very near the sound source (within 6 ft).
Through my research I found a great article on Understanding Microphone Sensitivity. I discovered that sensitivity is not a measure of quality but rather a characteristic of microphones. Mics that have higher sensitivity are not always better. You must also consider the microphone’s noise level, clipping point, distortion, and sensitivity.
Although sensitivity is not a measure of quality it is an important consideration toward capturing audio in larger classroom settings.
Frequency Response
A microphone frequency response chart can tell us how a given microphone performs at certain frequencies. Analyzing a microphone’s frequency response can help us better understand how a microphone will sound to the human ear. A really low male voice can reach a frequency below 100 Hz while a female voice can often start at 200 Hz. Vowel sounds are captured near the lower mid frequencies (200 to 1,000 Hz) while consonants are recorded near the upper mid frequencies (2 kHz and up). Air and breathiness is captured near the high frequencies (10 kHz an up).
Shaped Response Curve
The shape of a frequency response is called the response curve starting at zero on the low end and dropping off to zero at the high end. The peaks and dips in the curve can tell us how well a microphone is suited for a certain application.
A microphone intended for recording vocals will show a rise in its upper midrange that adds brightness and intelligibility to the voice. The high and low variations in a shaped response can be intentional by design allowing unwanted noise to drop off at very low frequencies or very high frequencies.
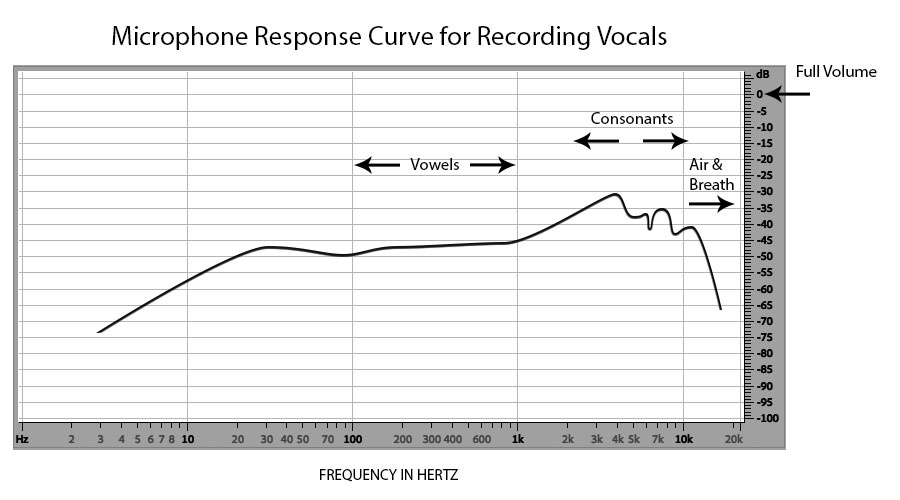
The frequency response chart above shows horizontal numbers with frequencies from 20 Hz to 20 kHz range. The vertical numbers represent amplitude or volume in dB (decibels).
MXL AC-360-Z Frequency Response
Below is a graph showing the frequency response for the MXL AC-360-Z microphone recorded with a male voice. The overall performance or ability to capture frequencies in the human vocal range was rather poor. The shaped response curve for the MXL mic below shows a higher amplitude under 2 kHz capturing more noise and boominess that is not really part of the human voice. There is also a significant drop off in amplitude from 2 kHz to 10 kHz where consonants occur.
Manufactures will often provide frequency response charts to aid consumers in purchasing microphones. Unfortunately MXL did not provide a chart or any technical specifications for the AC-360-Z microphone from their website. I did contact their technical support to request this information but did not receive a response.
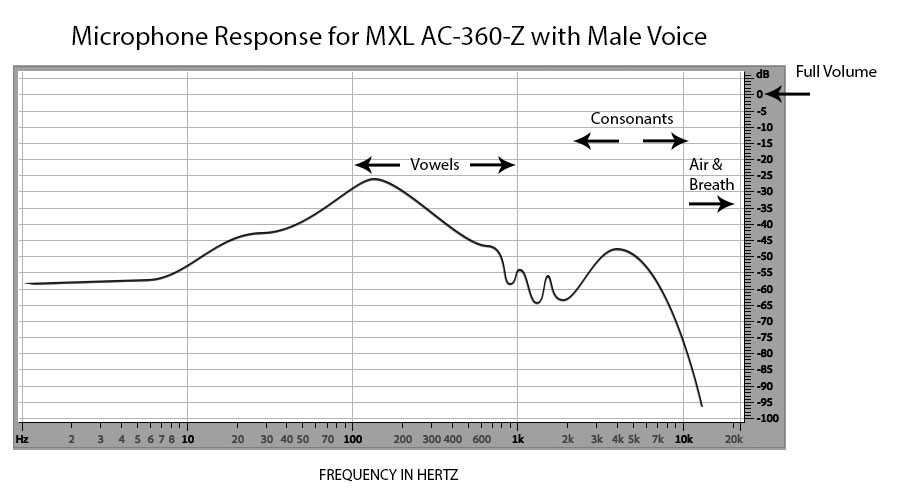
The shaped response curve for the MXL mic above shows a higher amplitude under 2 kHz capturing more noise and boominess that is not really part of the human voice. There is also a significant drop off in amplitude from 2 kHz to 10 kHz where consonants occur.
Loudness
In today’s technological society students are consuming content on a variety of devices in various environments. Loudness can really impact a listener’s experience. Modern research has led to new methods for measuring audio levels based on perceived loudness rather than just measuring level peak values.
Loudness Standards
We now have Broadcast Standards for Loudness which include methods for measuring both the Loudness Range (overall program material range) as well as Program Loudness (the average program material loudness).
The online content producer community had previously established -16 LUFS as the unofficial standard for online stereo content. LUFS are Loudness Units Relative to Full Scale. One unit of LUFS is equal to one decibel of sound. Recently Amazon and Spotify defined slightly louder levels for online audio content.
- ATSC A85 (US TV), NPRSS & PRX (-24 dB)
- EU R128 broadcast (-23 dB)
- Online/Podcast Mono & Stereo (-14 dB)
A short recording of four different microphones using Adobe Audition.
Loudness Test Results
We used our media studio space to record sample audio from each microphone. We recorded ambient tests using each microphone and then analyzed the audio for loudness and frequency responses.
Using Adobe Audition we analyzed and measured the overall quality and performance of the MXL mic and compared the results to other mics.
| Loudness Units Relative to Full Scale (LUFS) = 0 db | ||||
| Distance | AC-360-Z | AC-404-Z | Samson Go | Logitech Brio |
| 1 ft | -26 | -19 | -19 | -19 |
| 6 ft | -33 | -22 | -23 | -25 |
| 12 ft | -37 | -26 | -26 | -29 |
| 25 ft | -45 | -34 | -34 | -36 |
The table above includes the results of our ambient test recordings. The values displayed are in decibels relative to full volume at 0 db.
As you can see the AC-360-Z did not perform as well compared to the other microphones. The AC-360-Z captured a low volume even when the voice was recorded at a 1 ft distance. At 25 ft distance the perceived loudness drops off significantly. We saw similar results with our testing in various size classrooms and with the hybrid class we conducted using the AC-360-Z.
The MXL AC-404-USB microphone performed the best out of all the mics tested. This mic is the predecessor to the AC-360-Z and is designed to pickup audio from 25 ft away within a 180 degree range. The Samson Go Mic and Logitech Brio webcam also performed much better.
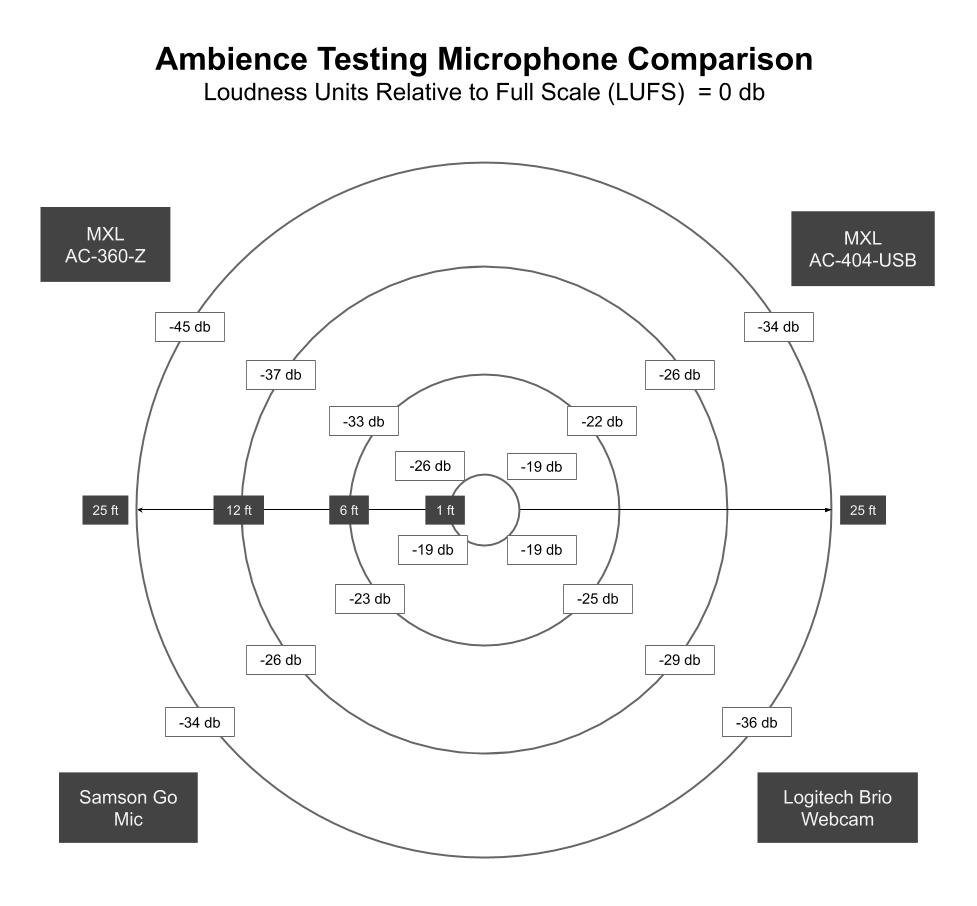
The chart above is a visual representation of my ambient tests showing the perceived loudness in LUFS measured from various distances.
Zoom Rooms Software Audio Processing
One advantage toward using Zoom Rooms is the audio processing capabilities. These features are normally found with expensive hardware Digital Signal Processors (DSP) in professional installations for room conferencing systems. Zoom Rooms offers design guides for both Do-It-Yourself (DIY) or Professional Installations. The software based audio processing Zoom Rooms can help manage microphone settings to optimize sound quality including echo cancellation, noise reduction and automatic gain control. The MXL AC-360-Z was designed specifically for use with Zoom Rooms and takes advantage of these features.
MXL AC-360-Z with Zoom Rooms
Using the MXL AC-360-Z mic I recorded sample audio in a Zoom Rooms meeting and compared it to sample audio recorded using Adobe Audition. The results showed significant differences in their frequency responses.
The audio from Zoom Rooms showed a significant drop off in the mid to high frequencies (6 kHz to 20 kHz). This is likely due to the noise cancellation from the audio processing which negatively impacts the quality of the sound and speech intelligibility.
The video above is a comparision of audio quality from recordings captured with the MXL mic using in Adobe Audition vs. Zoom Rooms.
Lessons Learned
Bring Your Own Device
Zoom Rooms was originally designed for huddle and conference rooms. Most classrooms at Chemeketa include a single computer at the instructor podium connected to a projector or HDTV display. Using Zoom Rooms in a classroom is a major shift for instructors. Zoom Rooms requires a BYOD (Bring Your Own Device) approach which may not be practical for some faculty.
Speaking Volume and Human Behavior
In most cases we found that students do not speak loud enough to capture good audio. Instructors are often accustomed to speaking louder and projecting their voices in the classroom. To address this challenge we can place microphones closer to students but this can also capture unwanted noise. We can try increasing microphone sensitivity or gain but this also introduces more noise in the audio. Passing around a handheld microphone in the classroom can provide improved audio quality but is not practical and can negatively affect student behavior in classroom discussions.
DIY vs. Professional
Zoom Rooms offers Design Guides for both Do-It-Yourself (DIY) and Professional AV Installations. DIY designs are considered simple plug and play solutions and are limited to small to medium size rooms.
Professional AV designs require experts who are well versed in audio and microphone configurations and optimization for room conferencing systems.
For the average size classroom (15 > people) you should consider a professional installation. There are several online guides and resources available to elevate your Zoom Rooms experience.
Here are some tips to elevate your Zoom Room audio:
Implement a Professional Audio Infrastructure
- Ceiling Microphones – upgrade to a microphone array with microphones strategically placed throughout the room.
- Digital Signal Processor – connect microphones to a DSP to process multiple mic inputs into a single digital output signal for improved audio (echo cancellation, noise reduction, equalization).
- In-ceiling Speakers with Amplifier – use speakers with a wide dispersal to spread out the sound throughout the room. Connect the speakers to your in-room amplifier to boost volume output.
View the Zoom Rooms Design Guides for recommendations on DIY vs. Pro AV, considerations for various room sizes, equipment lists, microphone layouts and more.
Zoom Rooms with Dual Screens
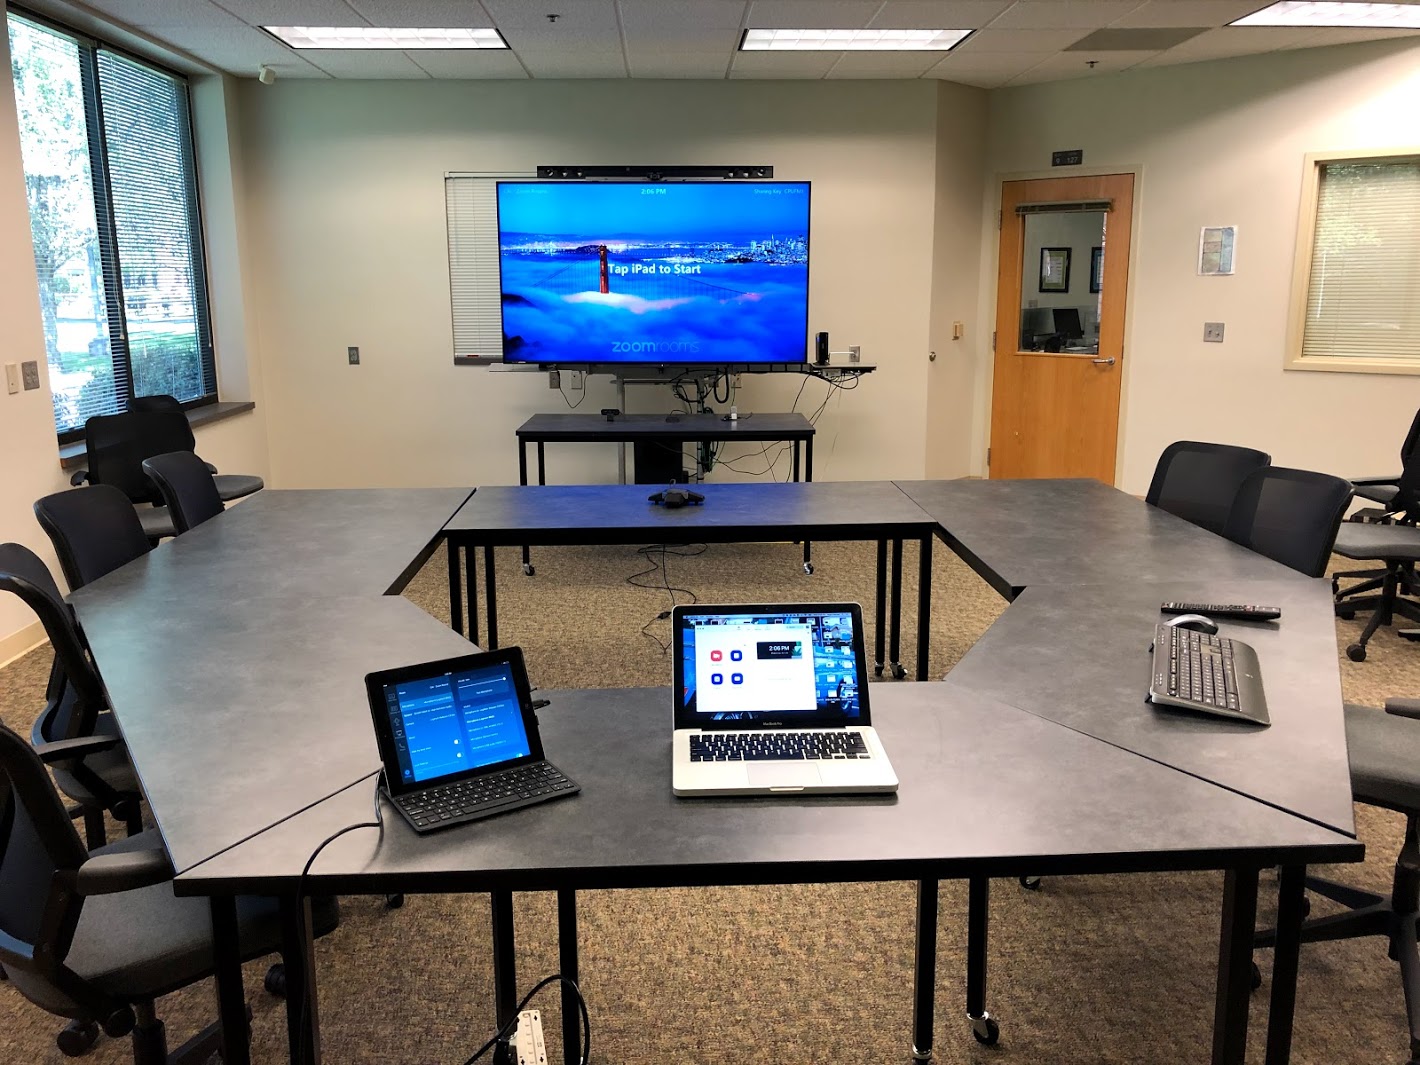
Zoom Rooms can reduce screen clutter by providing Zoom meeting controls on a seperate touch device. To really take advantage of Zoom Rooms you should be using at least two displays. This allows the instructor to display content fullscreen on one of the monitors while displaying students on the second monitor. Zoom Rooms can support up to three monitors with the third displaying the instructor fullscreen.
Next Steps
Ultimately the MXL AC-360-Z microphones did not support our goal of offering instructors an easy, portable solution for capturing high quality audio for hybrid courses in various classroom environments. However, through our testing we believe the MXL AC-404-USB microphone may be better suited for this purpose. We would like to collaborate with our college Media Services team to implement a dedicated Zoom Room on campus with a professional audio infrastructure installed.
2021-23 ED TECH REVIEWS


TECHNOLOGY EXPLORATION
Do you have an emergent technology you would like to explore? Submit your nomination for a technology evaluation by the OCCDLA Emergent Technology Workgroup.
The OCCDLA Emergent Tech Work Group receives nominations for instructional technology review from work group members and our nomination form, available to all instructors and administrative staff of all Oregon Community Colleges.
Questions?
For questions about the Emergent Technology Work Group:
Administrative Contact:
Monica Marlo
Portland Community College
monica.martinezgallagher@pcc.edu